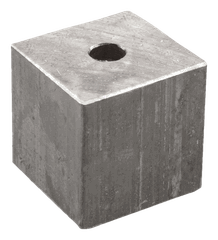
3D-Printed Sash Deflectors: A Modern DIY Take (with Example STLs)
Here’s a neat insight for anyone with a 3D printer and a noisy sash window: a deflector’s job is shape, not mass. A deflector weight isn’t really there to add balance — its sloped top deflects the opposing weight in the box so the two don’t clash as the sashes pass. And because that function is pure geometry, you don’t need lead for it at all. A hard-plastic part does the deflecting job just as well — which makes it a perfect candidate for 3D printing. This guide explains how, with two example models you can download.
If you’re not sure what a deflector is in the first place, our guide to makeweights, add-on weights and lead deflector weights covers the basics.
Why plastic can do a deflector’s job
A deflector weight sits on top of the existing sash weight, with the cord running through it. Inside the box, the upper and lower weights pass each other as the window opens and closes; if they catch, you get a knock or a snag. The deflector’s sloped, tapered top guides the passing weight clear. That nudging action depends entirely on the shape — a smooth angled surface in the right place — not on how heavy the part is.
So a printed plastic cap with a cord hole and a chamfered or cone-shaped top does exactly what a cast-lead deflector does for the anti-clash job.
One important caveat: plastic is light, so a printed deflector adds almost no balancing weight. It is not a substitute for a makeweight. If your sash needs more weight to balance, that still has to be lead (or another dense metal) — see the makeweights guide. Think of the printed part as the deflecting shape only.
What to print it in
This is a small part that takes rubbing and the odd knock — not a structural load — but it lives inside a working window, possibly for years, so material choice matters.
- PETG, ABS, ASA or nylon are the sensible choices: tough, a bit of heat tolerance, and they resist creep (slow deformation under sustained contact) better than the easy option.
- PLA prints beautifully and is fine for a quick try, but it’s more brittle and can soften or creep over time, especially anywhere warm. Treat a PLA part as a test rather than a permanent fit.
- Print it solid-ish: high infill (say 40–60%+) or thick perimeter walls, so it shrugs off knocks and doesn’t crush around the cord hole.
Design notes
If you’re modelling your own rather than using the examples below:
- Cord hole: a clean 10 mm hole suits common sash cord — match it to your cord and deburr it so it can’t chafe.
- The sloped top is the working surface — keep it smooth and angled so the opposing weight slides off rather than catches.
- Size it to your window: it should sit over the top of your existing weight and still clear the pocket and the parting bead with room to spare.
- Print orientation: orient so the layer lines don’t run straight across the cord hole or the thin sloped tip, which are the most likely places to split.
Two example designs to download
Below are two starter models — a round cone deflector and a square chamfered deflector — matching the two classic lead deflector shapes. They’re a starting point to print, test and adapt to your own window.
Example designs only — not load-tested. Print and use at your own risk, and always check the fit, clearance and security in your own window before relying on it. A part that works loose inside a sash box is a hazard.
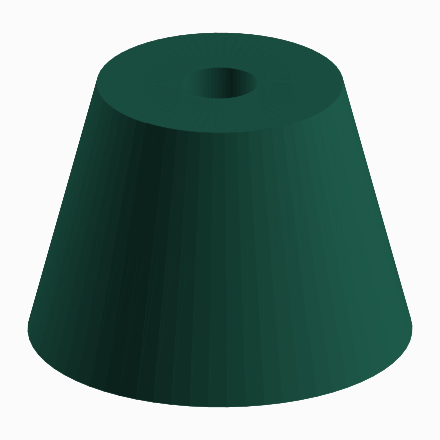
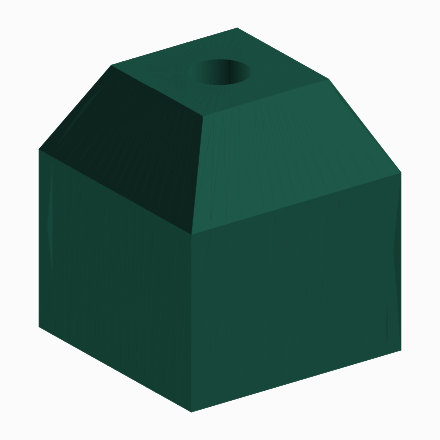
Scale them in your slicer if your weights or pocket differ, and adjust the cord hole to your cord.
For a better-engineered set — caps that actually socket onto the weight with a smooth dome or a steep four-way hip, in sizes for round and square weights — see our dedicated 3D-printed deflectors page.
Is it actually worth it?
Be honest with yourself about why you’re reaching for the printer.
- If you already own a printer and want a quick, lead-free deflector, or you’ve an odd-sized weight to cap, printing one is genuinely handy — and you can iterate the shape until it sits perfectly.
- If you don’t print, a cast-lead deflector weight is cheap and purpose-made, and it has the bonus of adding a little balancing weight too. For most people that’s the simpler route.
A 3D-printed deflector is a tinkerer’s solution: satisfying, customisable and lead-free, but not cheaper or easier than buying one unless the printer is already on your desk.
Safety and good sense
It’s a small plastic part, but it’s inside a window with a heavy weight on a cord:
- Make sure it’s secure on the cord and can’t slip off or jam in the box.
- Test gently through the full sash travel before trusting it.
- Remember it adds no real weight — don’t print one expecting it to fix a sash that needs more balance; that’s a job for lead.
- If you’re unsure the window is safely set up, ask a joiner.
The off-the-shelf alternative
A printed deflector is a fun, modern take on a very old problem — and the example STLs above are yours to try. But if you’d rather not fuss with filament, a cast-lead deflector does the same job, adds a touch of weight, and costs very little.
Either way, when you’re buying the actual weights, compare them properly: our live £/kg comparison table ranks UK suppliers cheapest-first, so the metal you do need costs you the least.